pihole on a raspberry pi Kubernetes cluster
In the words of one Raymond Quentin Smuckes, “it’s been a while since I had a victory with computers”. Yesterday I got Pi-hole running on my Rpi K8s cluster. I needed this win.
 Source: Achewood, the best web comic series ever
A couple of months back, through a Dark-Souls like process of catapulting myself brutally into failure until a glimmer of success dawned I slayed the KuberPiDragon by building a working cluster of three Raspberry Pi 3 computers. It turns out that this was one of the hardest ways to get started with Kubernetes due to Raspiian being relatively niche and the Pi being of ARM architecture, so many containers didn’t work. Anyway, after the battle I tried a few little projects.
First up, I built a simple web container deployment and that worked (eventually)! I then set up Grafana and IngressDB, but I couldn’t get it working smoothly enough and then life got in the way and I got distracted by producing modular markov music and other Eurorack related gubbins.
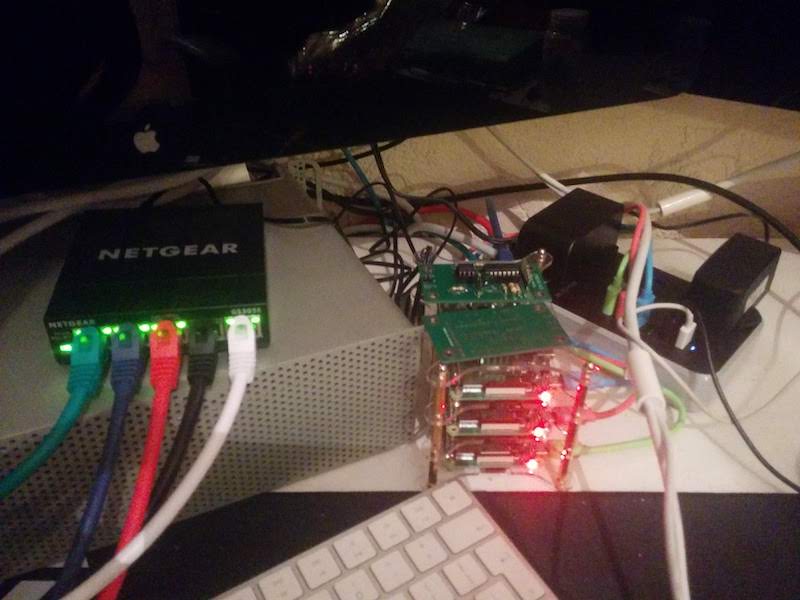
 My Pi cluster - now with a case and colour coded cabling
For $DAY_JOB, though, I really need to get to grips with Kubernetes so I rolled up my sleeves and got stuck in.
I recently ditched Virgin Media as an ISP due to their repeated price jacks (and keeping me on hold listening to cursed hold music for ninety minutes. At that point I’m so ragin’ that I don’t care if the service is free!). My new ISP is little better but what you gonna do (brother). So, when the new router arrived I figured I’d take some ownership of my network. You know, now that I’m not terrified of networking any more.
So, I decided to set up Pihole which is a DNS server with integrated ad blocking. Installing Pihole on a Raspberry Pi is apparently straightforward. Furthermore, there are containers built for Pihole that are ARM based. So, sounds like a good candidate!
What for?
Having some control over my DNS is a part of armouring my family against malware and trackers. As my kids get old enough to be aware of the internet, I’ll also want to make sure they don’t stumble across stuff they’re not ready for.
And of course, I don’t want to be constantly marketed to.
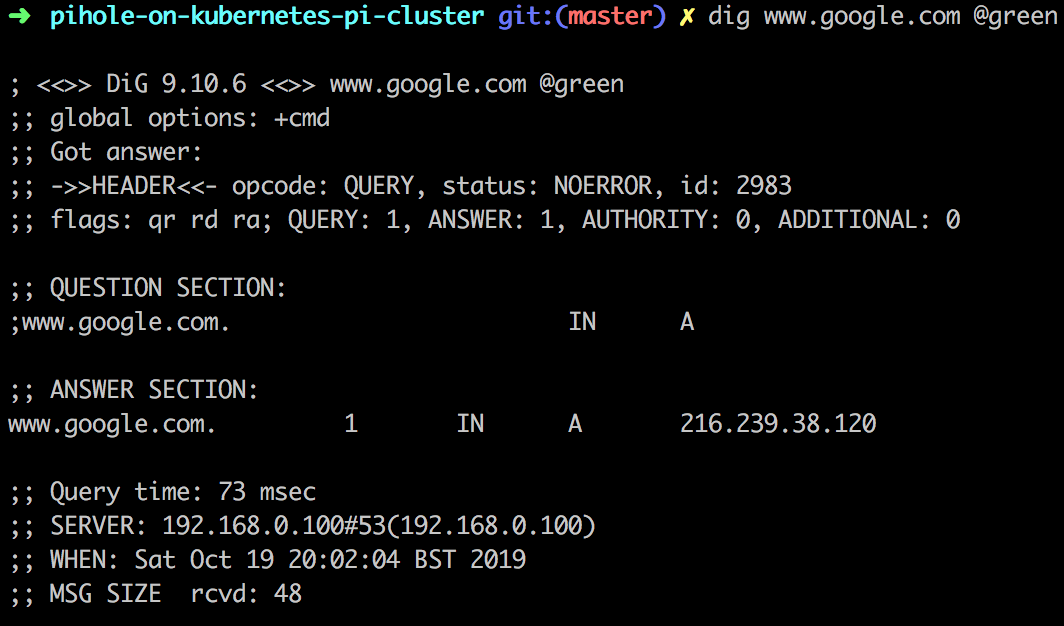
Finally, it’s a great learning tool. For example, I properly got to grips with the dig tool as I was testing this, and I understand DNS as a whole a little better than I did before.
 Using Dig to test my Pihole installation
Oh, and I just like doing stuff like this!
Installing Pihole
There are several Helm charts out there for installing Kubernetes but at this stage I don’t want to use Helm. I do use Helm in $DAY_JOB but I really want to use K8s as vanilla as possible whilst I learn the ropes.
My janky yaml
Let me get in my cringing first:
- This is me learning, PLS NO BULLY
- I’ve told it to run on a specific node on my Pi cluster on a specific IP
- I’ve not configured any kind of persistence yet
- I had half a dozen false starts before I got this working
- Srsly, pls no bully. I get that the main clever sausages of the Internet spend a lot of time sneering, and I don’t need that. Unless you can bench more than me AND beat me at Swingball.
- It’s not production code, STOP HITTING ME THIS IS JUST FOR FUN
---
apiVersion: apps/v1
kind: Deployment
metadata:
  name: pihole
  labels:
    app: pihole
spec:
  replicas: 1
  selector:
    matchLabels:
      app: pihole
  template:
    metadata:
      labels:
        app: pihole
    spec:
      nodeSelector:
        kubernetes.io/hostname: 'green'
      containers:
      - name: pihole
        image: pihole/pihole:latest
        imagePullPolicy: IfNotPresent
        stdin: true
        tty: true
        ports:
        - containerPort: 80
          name: pihole-http
          protocol: TCP
        - containerPort: 53
          name: dns
          protocol: TCP
        - containerPort: 53
          name: dns-udp
          protocol: UDP
        - containerPort: 443
          name: pihole-ssl
          protocol: TCP
        - containerPort: 67
          name: client-udp
          protocol: UDP
        env:
          - name: TZ
            value: "Europe/London"
          - name: WEBPASSWORD
            value: <redacted>
          - name: 'DNS1'
            value: '127.0.0.1'
          - name: 'DNS2'
            value: '8.8.8.8'
---
apiVersion: v1
kind: Service
metadata:
  name: pihole
  labels:
    name: pihole
spec:
  type: NodePort
  externalIPs:
    - 192.168.0.100
  selector:
    app: pihole
  externalTrafficPolicy: Local
  ports:
  - name: dns
    port: 53
    protocol: UDP
  - name: dnstcp
    port: 53
    protocol: TCP
  - name: web
    port: 80
    protocol: TCP
I applied this using kubectl apply -f deployment-pihole.yaml and then I had my own DNS server on 192.168.0.100 (the Pi with hostname green).
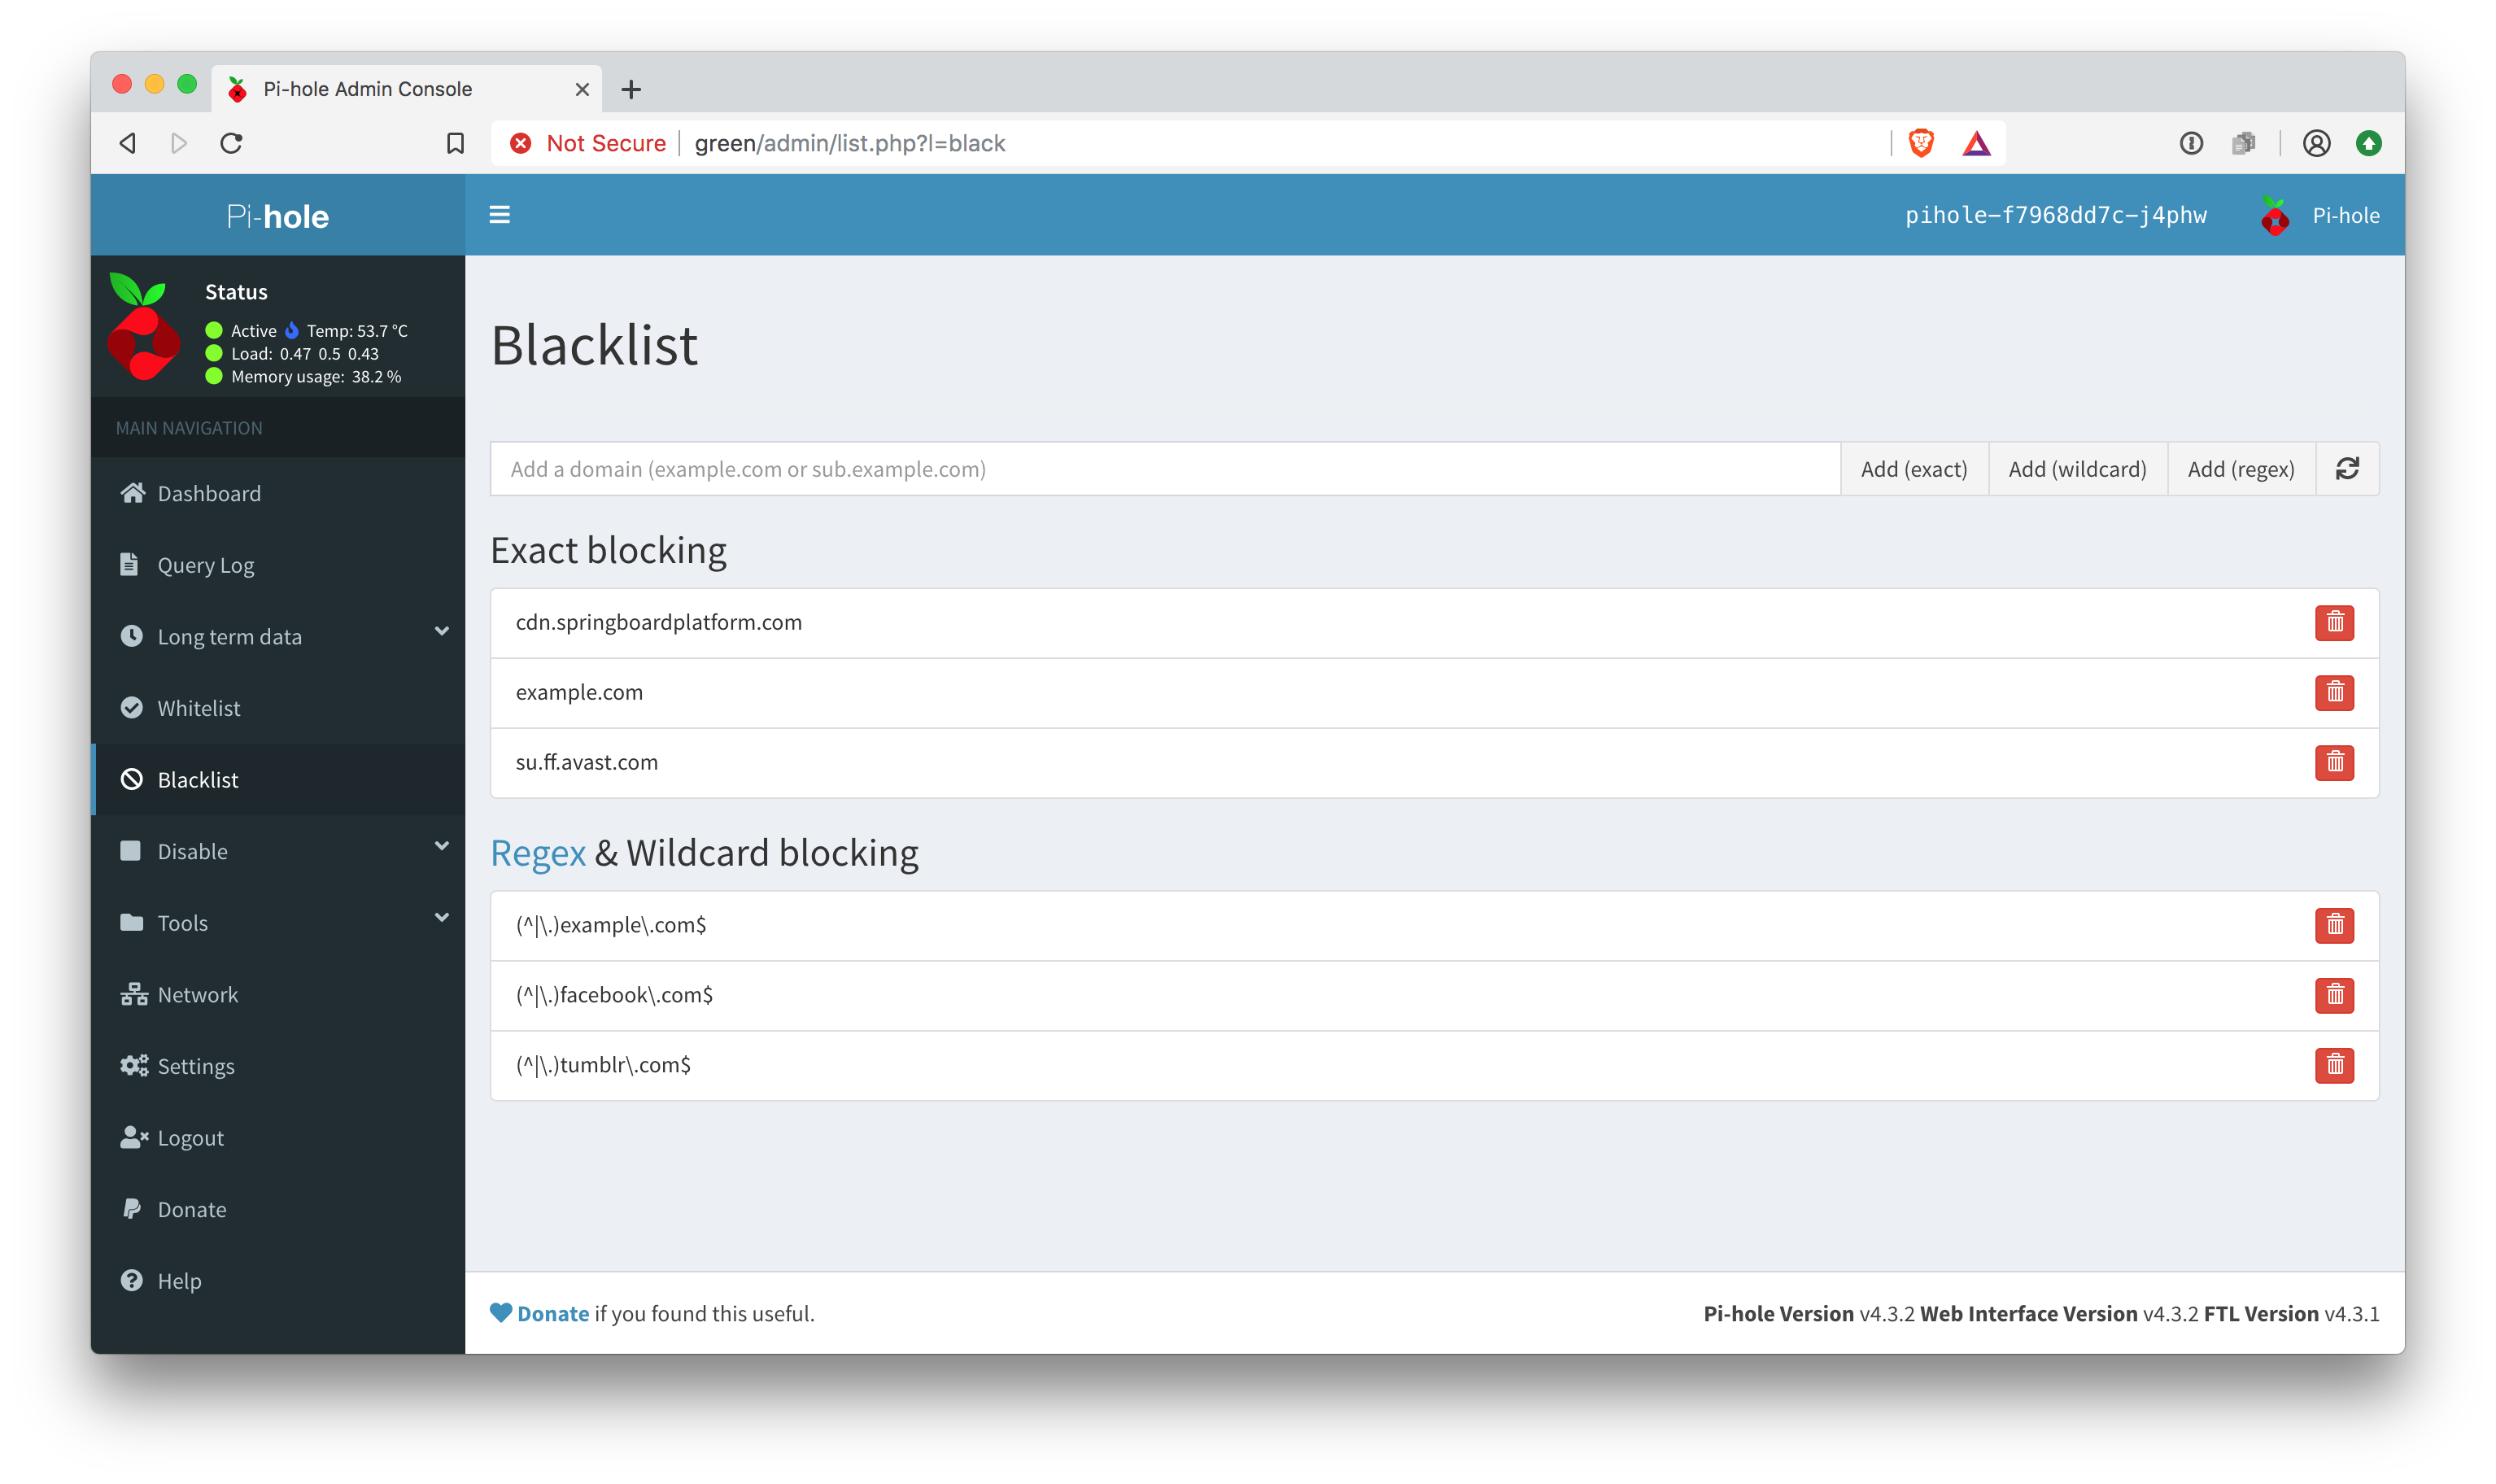
 Pihole up and running and blocking Facebook like a G
What other config?
In addition to the default blocklists on Pihole, I used the big blocklist collection. I also blocked Facebook and Tumblr, because bun dem cesspools.
Rough layout
Here’s roughly what my setup looks like:
 Network rough layout
The devices on the network are configured explicitly to use host green for their DNS provider (my ISP don’t allow me to do that on a router, which sucks, and makes me suspect that they’re doing voodoo upstream, so I need to look more into that).
What’s next?
- Configure proper persistence via persistent volume claims
- Create my own Helm chart
- Make sure I’ve secured everything correctly and that it’s not accessible from outside my home
- Figure out if my ISP are doing shady things with DNS and if so consider switching to DNS over HTTPS
Recommended reading
My mate Rich said, half-jokingly I think, “Kubernetes is for people who don’t feel that Docker is complicated enough for them” and I have a lot of sympathy for that! However, K8s isn’t going away so I’m gonna stand and fight.
As I said in a previous blog post “I wish tech books had shorter chapters”, I rely on books to learn topics holistically rather than just patch my knowledge together from Stack Overflow. The best two books I’ve so far read on Kubernetes are:
- Managing Kubernetes - as a sysadmin, I found this by far the most valuable resource I’ve read on it as it shows what all the “building blocks” are.
- Kubernetes up and Running - more “application level” - a very thorough treatment, but with a few errors in it that misled me in places. I expect the second edition is better.
 More recent:
 Up to homepage
 Music Player
 Older: