
DIY Arduino Based Hackable Euclidean Drum Machine
Video of it in operation:
- Get the source code https://github.com/gavD/arduino-drum-machine
- Peter Polmeartagami, inspired partially by this project, has created an Instructable showing how to build his “doof machine”! Recommended!
Overview
This project is an Arduino DIY drum machine, based on the Mozzi open source library, which uses 8-bit samples. It uses 3 channels, each with 3 selectable voices. Each voice has a pattern selector to choose sequence length and number of beats. This uses Euclidean maths, a bit like a simple version of the Euclidean Circles module.
So, for example, you could have channel A playing a pattern of 16 steps, with channel B playing 7 steps. This way, you can get polymetric rhythms.
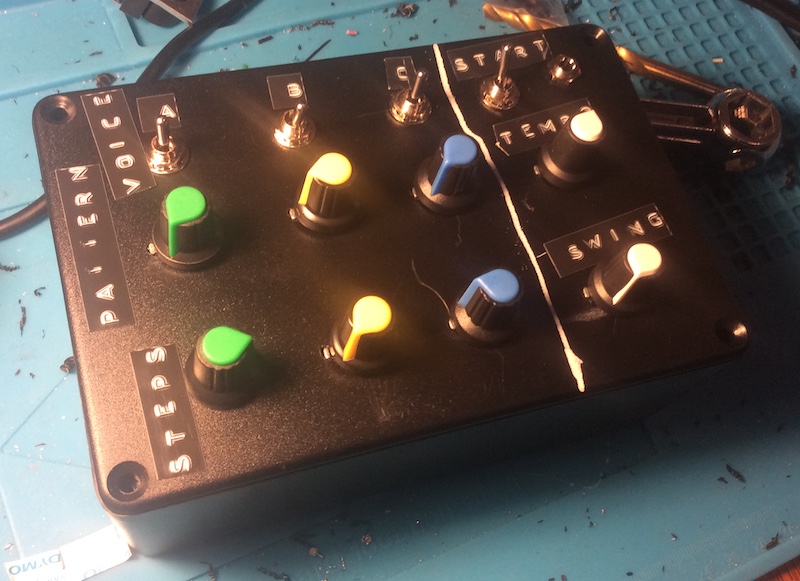
It comes loaded with samples taken from a Yamaha DD-5 digital drum machine, but you can load anything you like!
Hardware: Building a DIY Arduino Drum Machine
You can build it any way you like using whatever case you want! I’ll show you how I did mine.
I’ll assume you’re using an Arduino Nano - you do need at least 8 Analog inputs for the full build
(you could modify the software to hard-code tempo and swing if you’re using an Uno, to free up two analog inputs)
Here is a Bill of materials (BOM) for the components as I’ve used them:
| Pin | Component | Purpose |
|---|---|---|
| Analog 0 | B10k pot | Swing amount |
| Analog 1 | B10k pot | Channel A beat density |
| Analog 2 | B10k pot | Channel B beat density |
| Analog 3 | B10k pot | Channel C beat density |
| Analog 4 | B10k pot | Tempo |
| Analog 5 | B10k pot | Channel A sequence length (1-16 steps) |
| Analog 6 | B10k pot | Channel B sequence length (1-16 steps) |
| Analog 7 | B10k pot | Channel C sequence length (1-16 steps) |
| Digital 2 | 2 position switch | Starts and stops the drum machine |
| Digital 3 and Digital 4 | 3 position switch | Select voice C |
| Digital 5 and Digital 6 | 3 position switch | Select voice B |
| Digital 7 and Digital 8 | 3 position switch | Select voice A |
| Digital 9 | Mono jack socket | Audio out |
here is a wiring diagram:
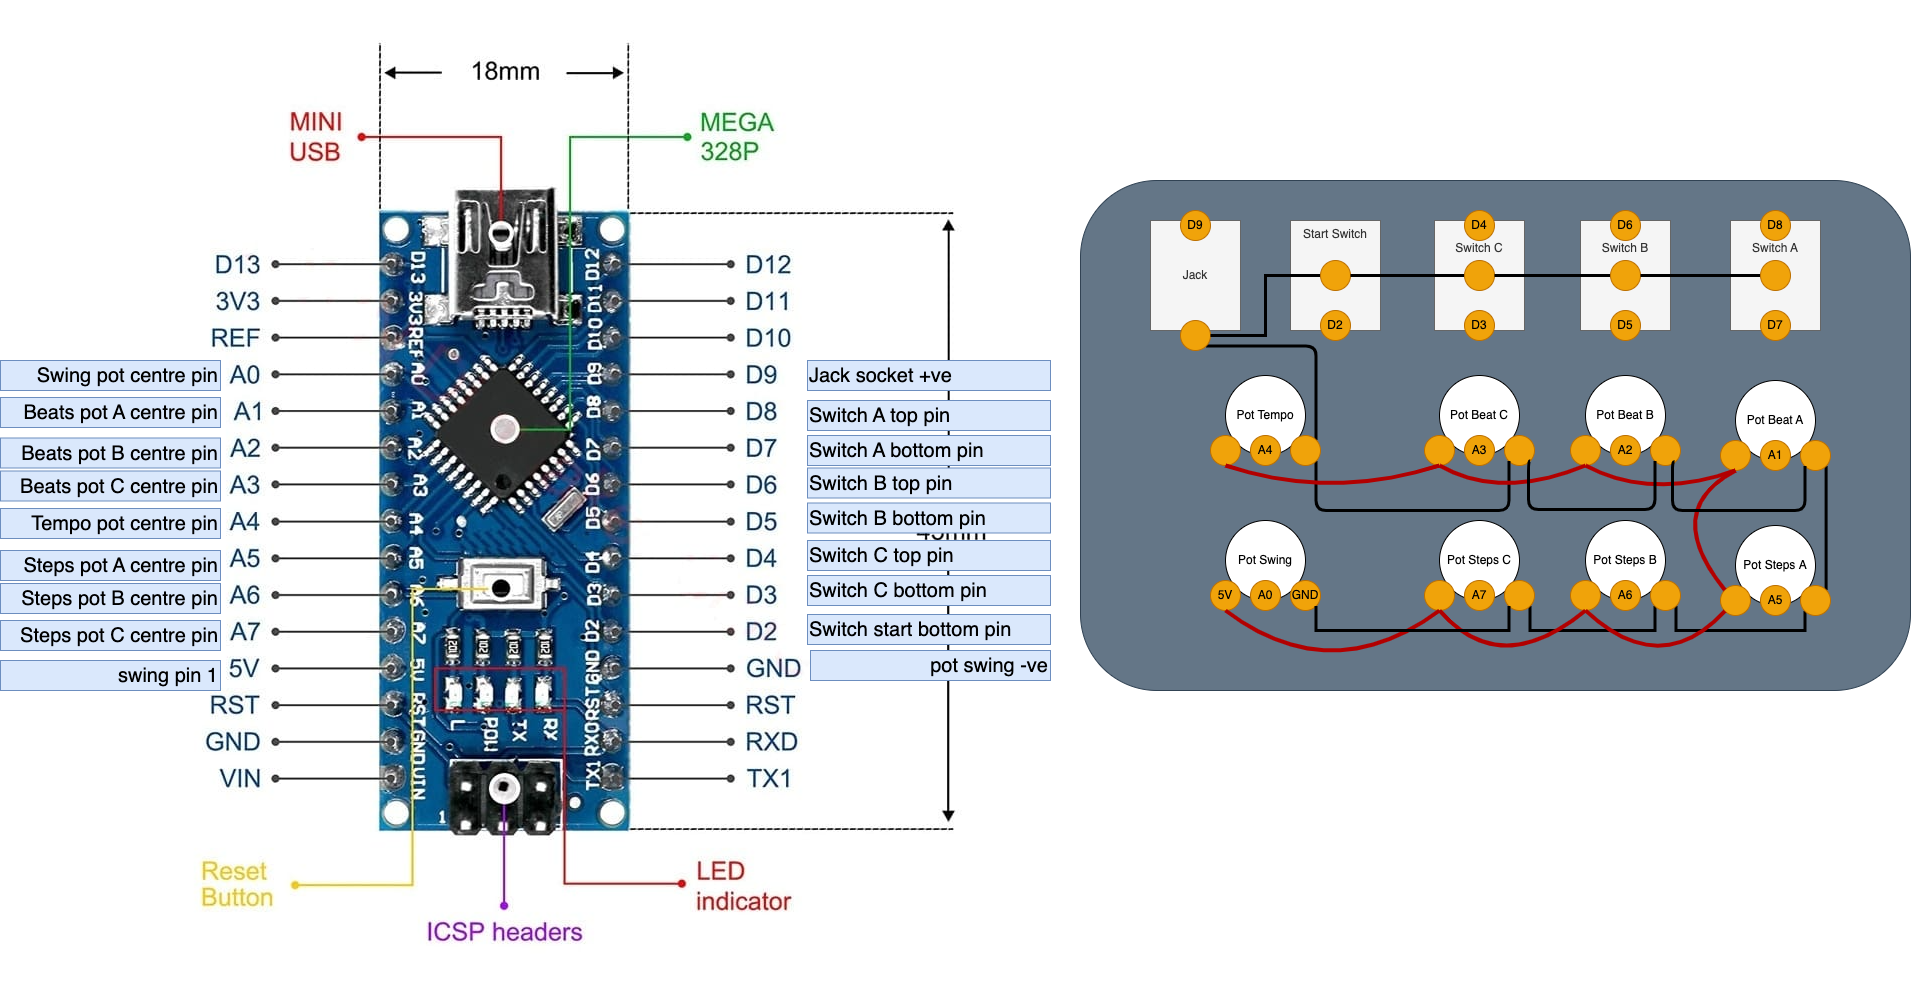
Here is a video of how it is wired:
The beat density is a proportion of the sequence length. So, if sequence length is 8, beat density will be from 0-8 beats. Beats are spaced as evenly as possible in the sequence. Experiment with different settings to create polymetric rhythms!
Here’s an example of how I’ve built mine, excuse the poor photos, I don’t have a good camera:
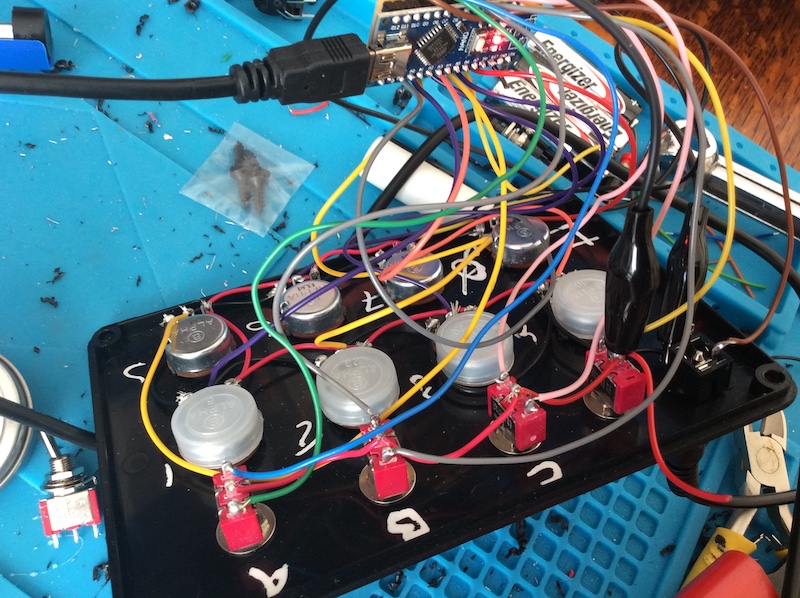
I drilled hole into a plastic case I bought from Bitsbox.
Note that the switches are all in pullup mode, so, although I used a red wire, they’re going to ground. In this image, I’ve also croc clipped the negative rail from the jack to the rightmost switch. It’s a work in progress shot!
Developing software for the DIY Arduino Drum Machine
You’ll need:
If you want to load your own samples, you’ll additionally need:
- FFMPeg for converting WAV files to RAW on the CLI. There are other ways to convert the files, but FFMpeg is what I use
- Python for running char2mozzi.py from the Mozzi library scripts. Alternatively, Audacity can output raw audio files
Loading a sample into the drum machine
You can load whatever samples you like into this box!
Any sample for conversion must be:
- In headerless unsigned 8 bit raw format
- Mono
- Sample rate of 16384
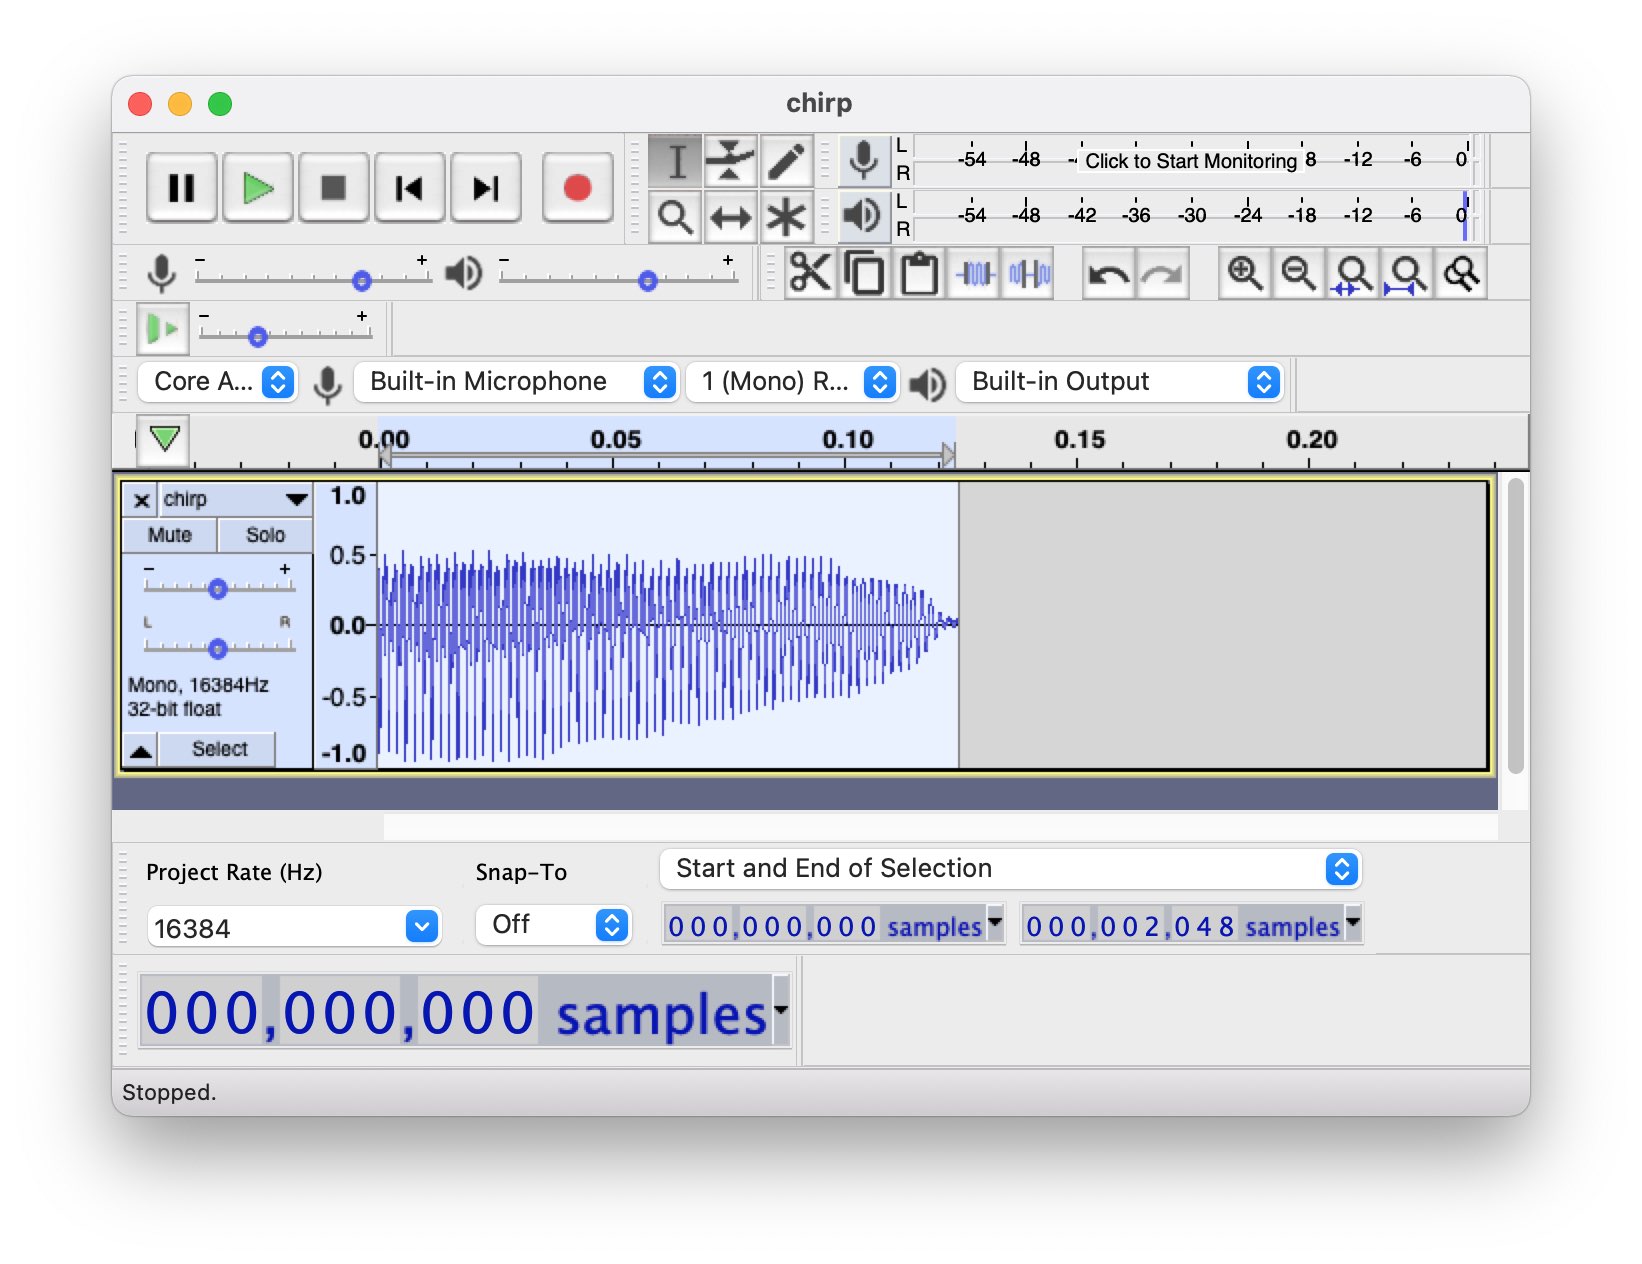
- Precisely 2048 samples long (Audacity, for example, can be configured to show sample count for selections)
From Audacity, it would look like this:
Export to “Other uncompressed files” like:
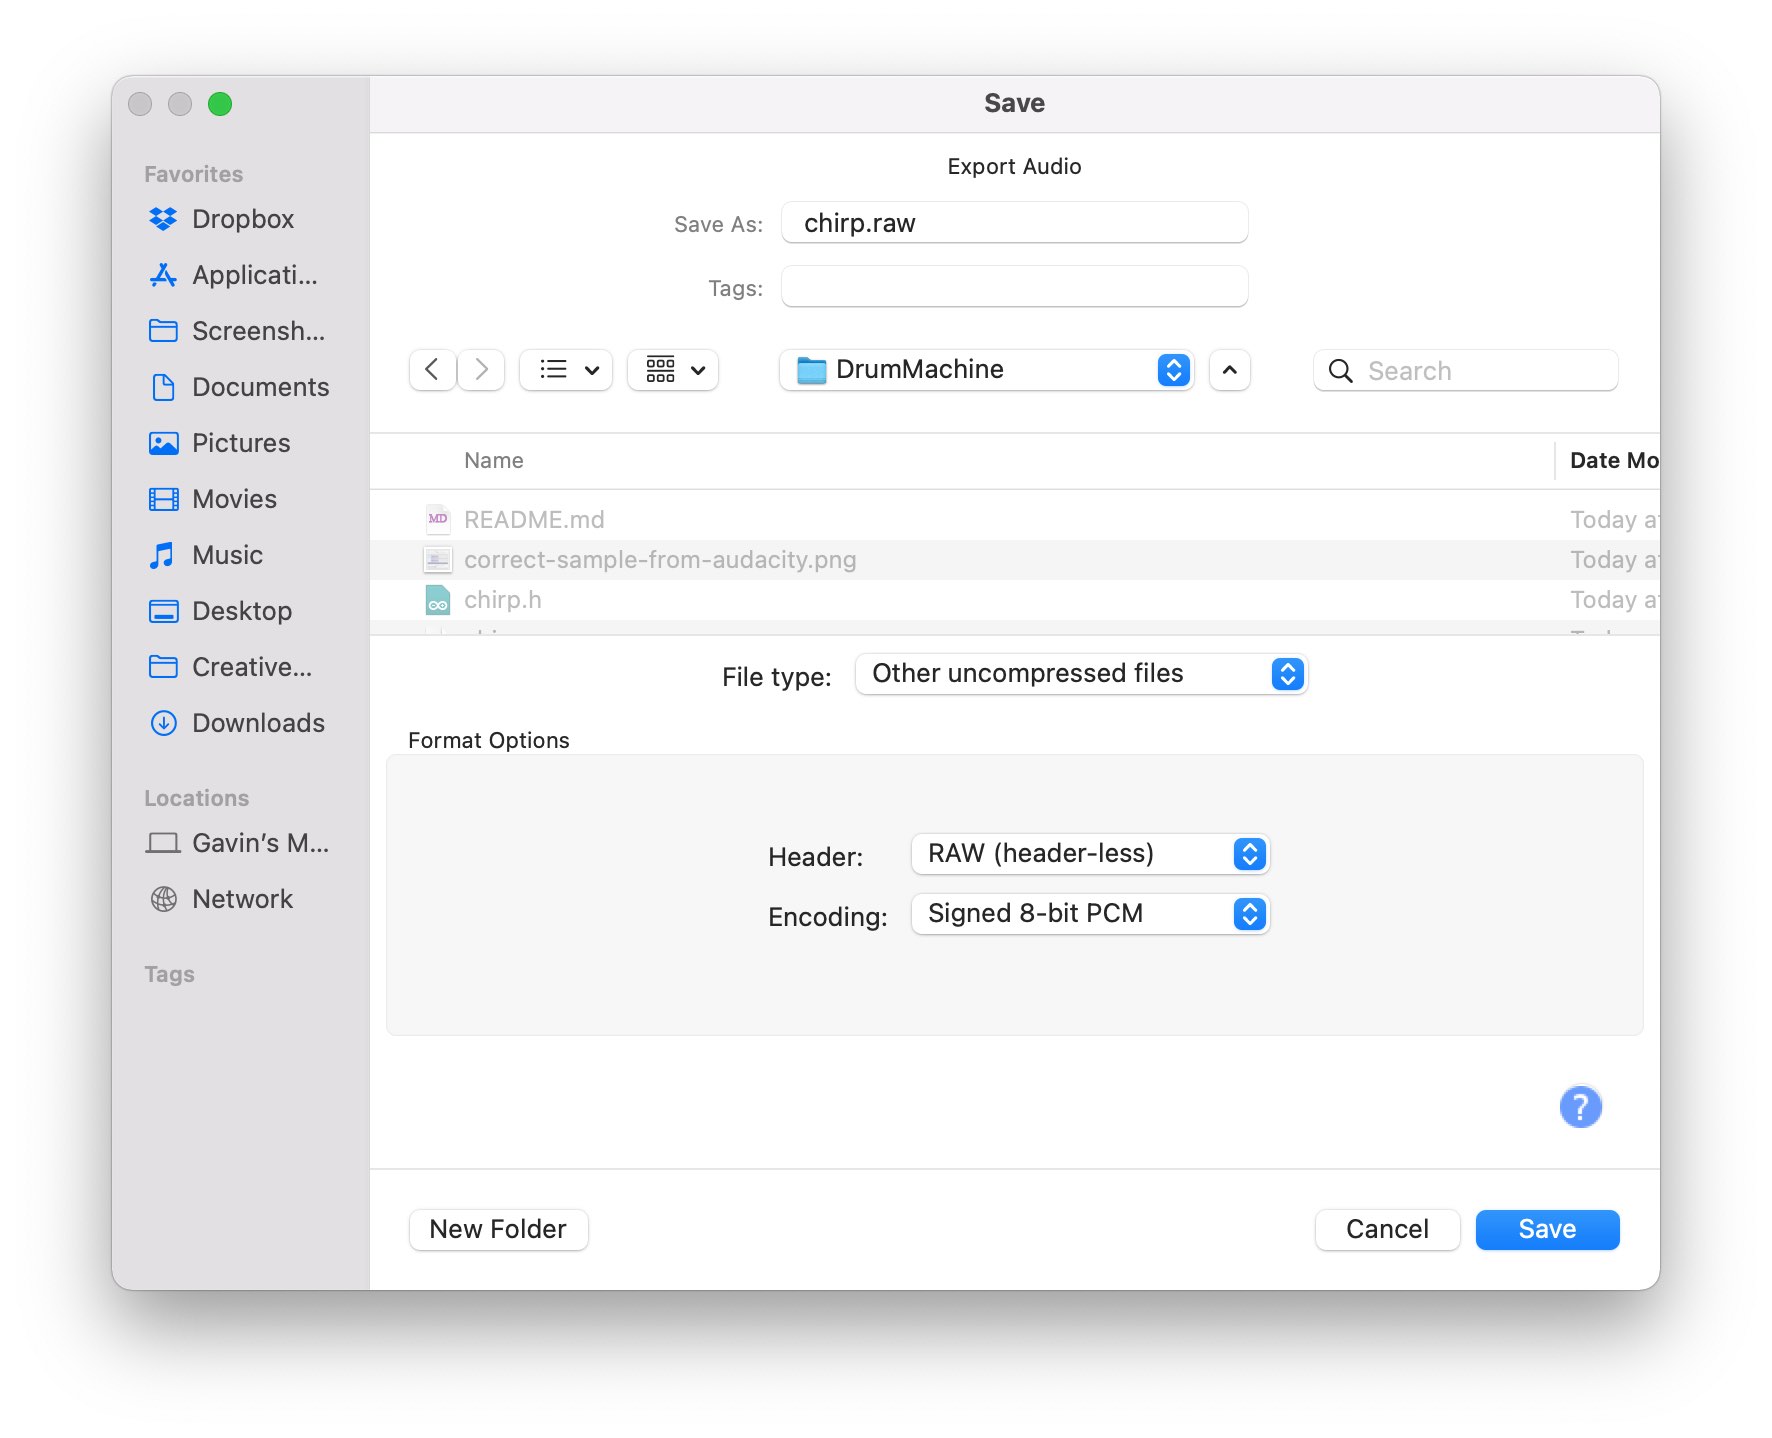
If you have a WAV, you can convert to RAW with ffmpeg, something like:
# Convert a WAV to a signed headerless 8 bit raw file (or output raw from your audio editor)
# let's convert a file called chirp.wav
FILE=chirp

ffmpeg -y -i ${FILE}.wav -f s8 -acodec pcm_s8 ${FILE}.raw
Now we can convert that to an 8 bit wavetable containing 2048 samples that the drum machine can use:
# Use char2mozzi.py to convert to a wavetable of the right length (2048)
# to a C header file that Mozzi can consue
python ../Mozzi/extras/python/char2mozzi.py ${FILE}.raw ${FILE}.h ${FILE} 16384
TODO list
I’m working on:
- Adding Swing
Possible modifications
This machine is totally hackable! You could:
- Add trigger outputs for each channel
- Add LEDs for each trigger notification
- Vary velocities
- Pitch control of the voices (or a global pitch control!)
- Voice randomisation
 More recent:
 Up to homepage
 Music Player
 Older: